-
효율적인 API 문서 관리를 위한 Swagger 도입Server/Nest.js 2023. 3. 10. 16:26
Swagger
What’s problem : API 명세서 관리
프로젝트를 하면서 불편한 점을 하나씩 해결해보고자 한다. 이번에는 API 명세서를 작성하며 느낀 불편함을 개선해보기로 했다.
보통 프로젝트를 시작할 때 API를 개발하기 전에 명세서를 먼저 작성하여 프론트엔드 팀원에게 공유하고, API 개발이 끝나면 postman을 활용해 API 명세를 공유하고 있었다.
Gitbook으로 직접 손으로 작성하는 것 보다는 postman이 편했지만, postman으로 API 명세서를 작성하다 보니 API가 어떻게 동작하는지에 대한 자세한 설명을 기입할 수가 없고
크고 작은 수정이 발생하면 직접 해당 API를 postman 통신하여 예외처리한 부분들까지 적용해주는 과정이 꽤 번거로웠다.
How solve the problem?
그래서 고민하던 중 Swagger라는 프레임워크가 있다는 것을 알게되었다.
Swagger란 애플리케이션의 Rest API 문서를 자동으로 구성해주는 도구이다.
Swagger를 활용하면 API 명세서가 제대로 작성되지 않았을 때 발생하는 다음과 같은 문제를 해결할 수 있다고 한다.
1. API 명세서가 전혀 존재하지 않아서, 코드를 전부 확인하는 과정에서 개발 시간이 너무 오래 걸립니다.
2. 클라이언트 개발자는 서버 개발자에게 API가 어떻게 동작하는지 물어보면서 개발해야 합니다.
3. 개발할 때는 시간이 적게 걸릴 수 있지만, 유지 보수를 할 때, 시간이 상당히 오래 걸립니다.
- 출처 : https://overcome-the-limits.tistory.com/101How to do?
swagger를 사용하기 위해서는 swagger 모듈을 설정해준 후,
@ApiProperty(), @ApiResponse(), @ApiOperation() 등의 데코레이터를 코드 내에 선언해주면 된다.
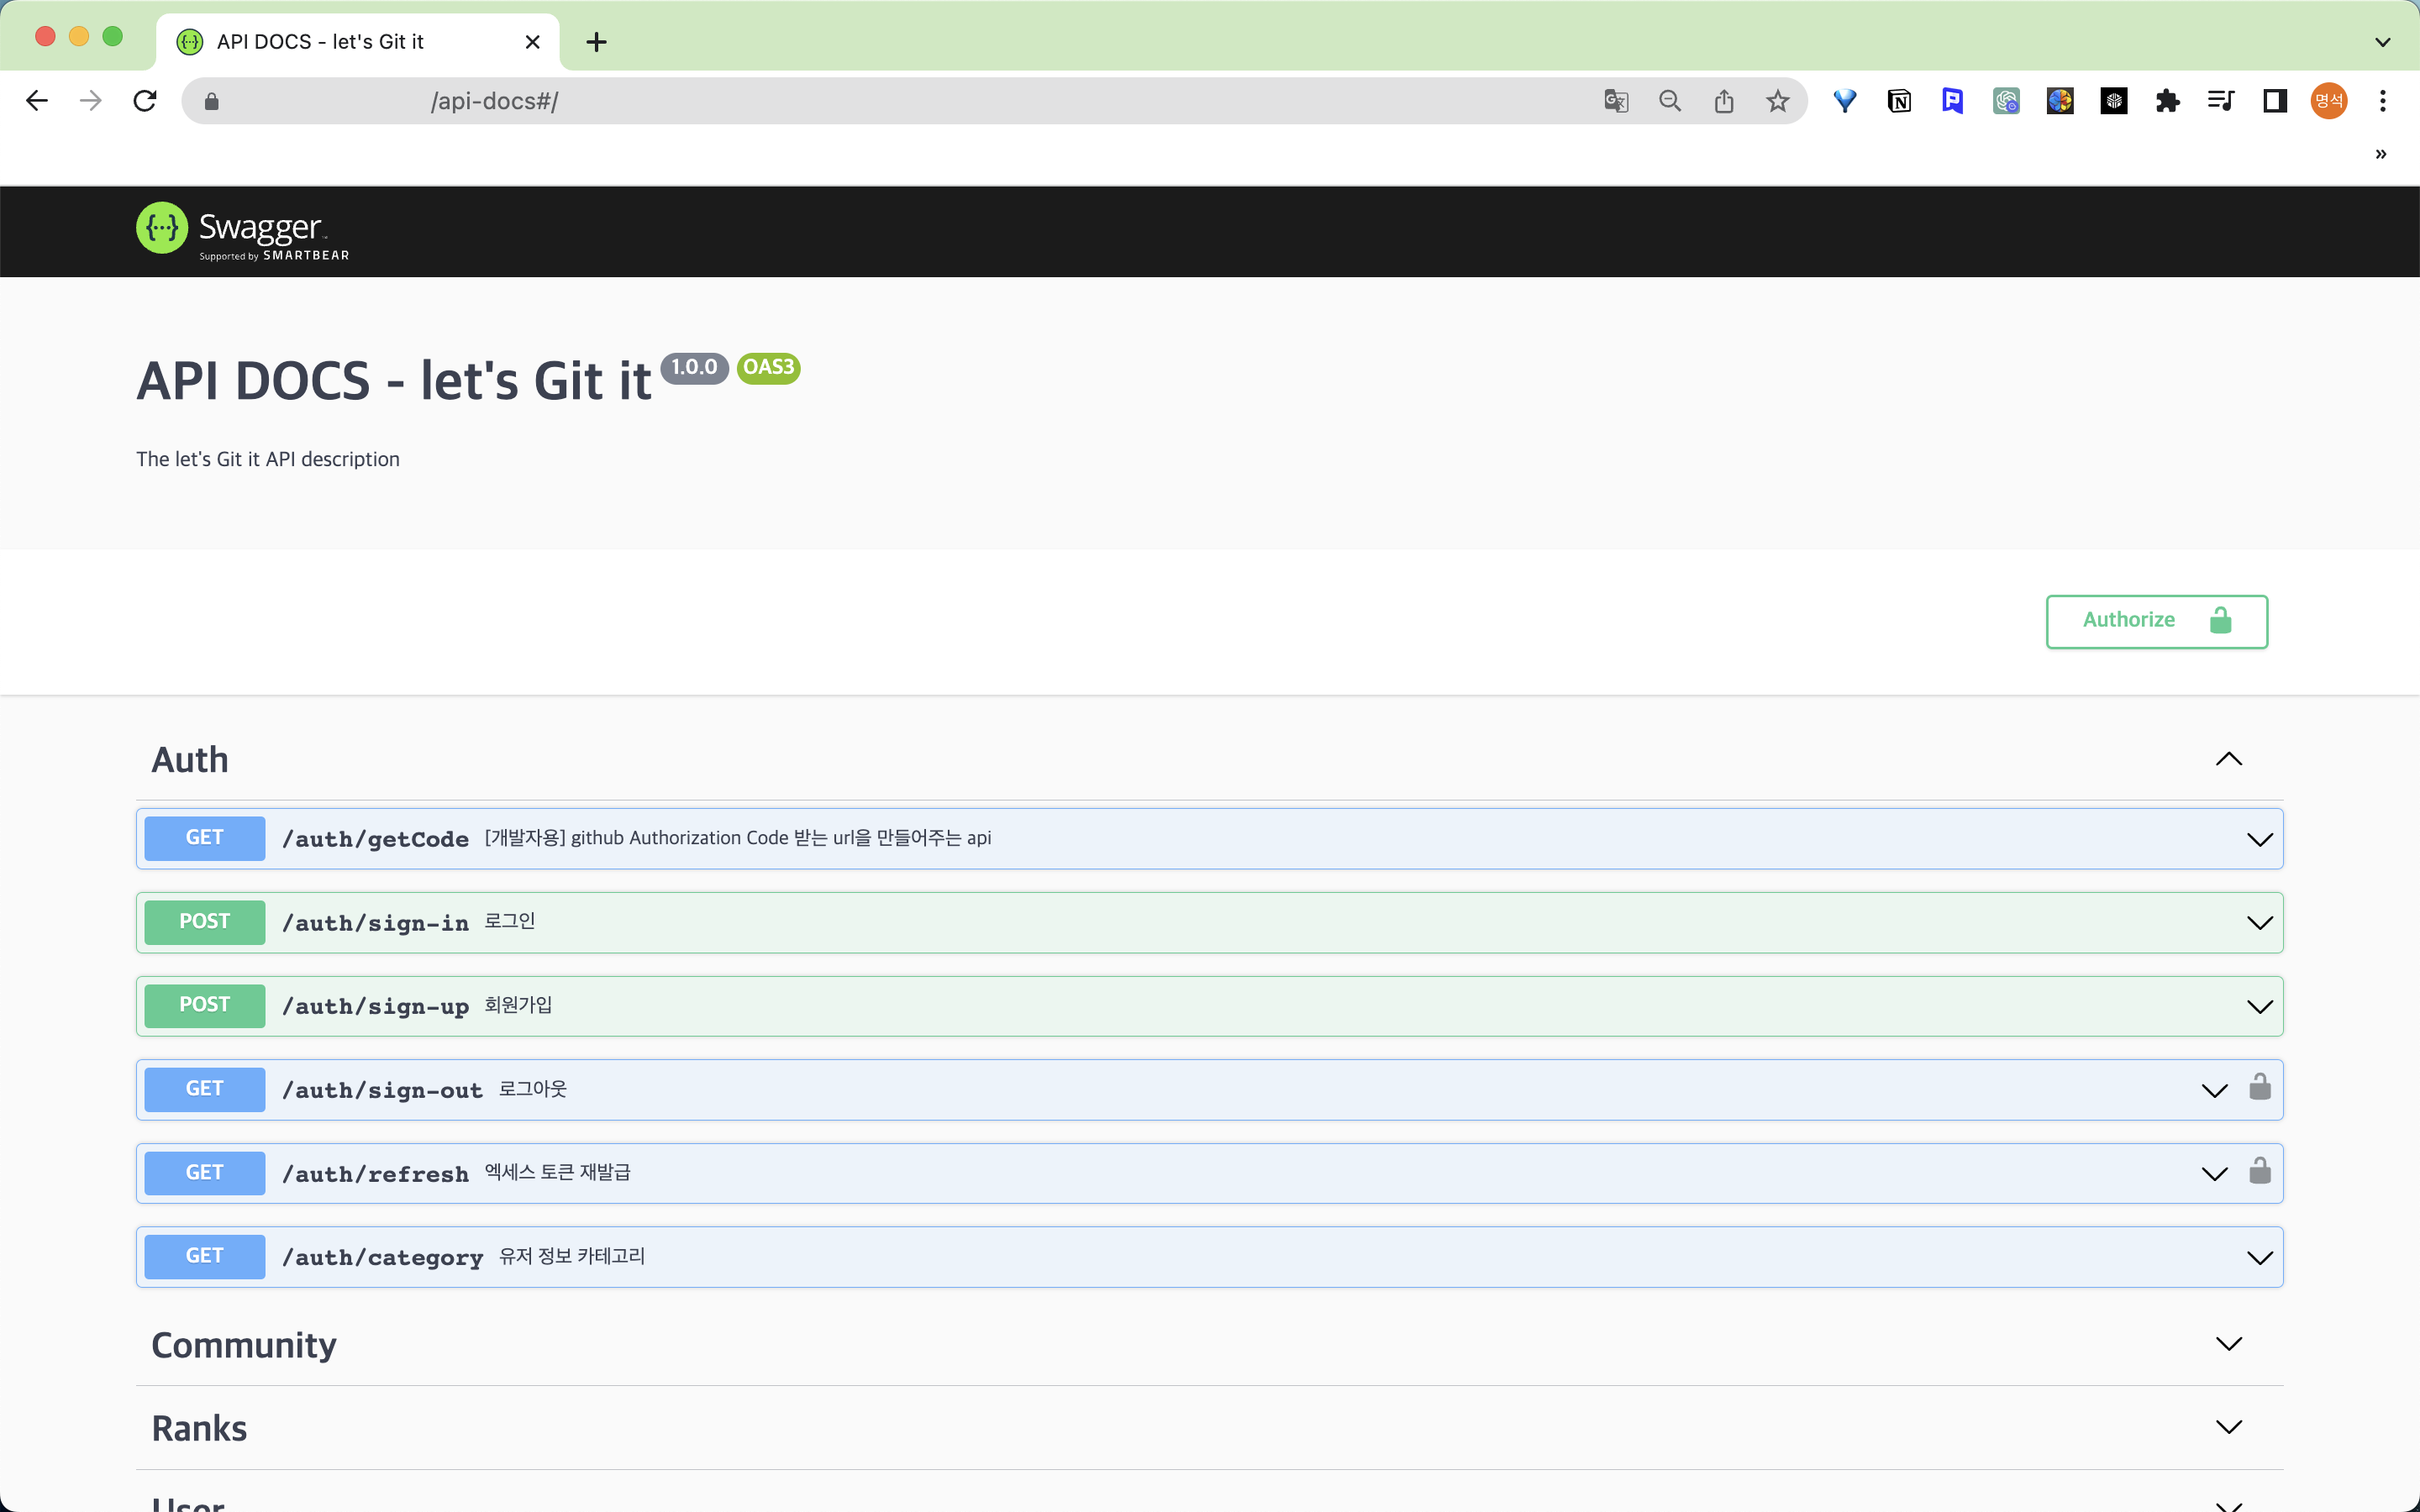
현재 우리 프로젝트는 서비스가 운영중이기 때문에(2023.4.20 기준) api문서에 권한 없는 접근은 막아야 된다고 생각했다.
그래서 npm 패키지 중 express-basic-auth 라이브러리를 활용해 swagger api-docs에 접근을 시도할 때 로그인을 하도록 설정해두었다.
참고
- https://www.npmjs.com/package/express-basic-auth
- https://docs.nestjs.com/openapi/introduction// swagger.ts import { INestApplication } from '@nestjs/common'; import { SwaggerModule, DocumentBuilder, SwaggerCustomOptions, SwaggerDocumentOptions, } from '@nestjs/swagger'; export class SwaggerSetup { private app: INestApplication; constructor(app: INestApplication) { this.app = app; } setup(): void { //웹 페이지를 새로고침을 해도 Token 값 유지 const swaggerCustomOptions: SwaggerCustomOptions = { swaggerOptions: { persistAuthorization: true, withCredentials: true, }, customSiteTitle: `API DOCS - let's Git it`, }; const swaggerConfig = new DocumentBuilder() .setTitle("API DOCS - let's Git it") .setDescription(`The let's Git it API description`) .setVersion('1.0.0') .addTag('Auth') .addTag('Community') .addTag('Ranks') .addTag('User') //JWT 토큰 설정 .addBearerAuth( { type: 'http', scheme: 'bearer', name: 'authorization', in: 'header', bearerFormat: 'JWT', }, 'accessToken', ) .addCookieAuth('Refresh') .build(); const swaggerOptions: SwaggerDocumentOptions = { operationIdFactory: (controllerKey: string, methodKey: string) => methodKey, }; const swaggerDocs = SwaggerModule.createDocument( this.app, swaggerConfig, swaggerOptions, ); SwaggerModule.setup( 'api-docs', this.app, swaggerDocs, swaggerCustomOptions, ); } }// main.ts async function bootstrap() { const app: NestExpressApplication = await NestFactory.create(AppModule, { httpsOptions, }); // ... 기타 로직 생략 // dev server & local server에서만 Swagger docs 생성 if (process.env.DEV === 'dev') { app.use( ['/api-docs'], basicAuth({ users: { [process.env.SWAGGER_USER]: `${process.env.SWAGGER_PASSWORD}`, }, challenge: true, }), ); new SwaggerSetup(app).setup(); } await app.listen(PORT); } bootstrap()// auth.controller.ts /** * @author MyeongSeok * @description 회원가입 * @param userData */ @Post('/sign-up') @ApiOperation({ summary: '회원가입', description: 'userName, githubId, fieldId, careerId, isKorean 등 유저의 정보를 받아 회원가입 처리 이후 accessToken을 리턴합니다.', }) @ApiOkResponse({ description: '회원가입이 되어 accessToken을 리턴합니다.', type: AuthSignUpCreatedDto, }) @HttpCode(HttpStatus.CREATED) signUp(@Body() userData: SignUpWithUserNameDto) { return this.authService.signUp(userData); }// auth.dto.ts export class SignUpDto { /** * 유저의 github userId 입니다. * @example 12345 */ @ApiProperty({ description: '유저의 github userId 입니다.', example: 12345, required: true, }) @Type(() => Number) @IsNumber() readonly githubId: number; /** * 개발분야의 id 입니다. * @example 1 */ @ApiProperty({ description: '개발분야의 id 입니다.', example: 1, required: true, }) @Type(() => Number) @IsNumber() readonly fieldId: number; /** * 개발경력의 id 입니다. * @example 1 */ @ApiProperty({ description: '개발경력의 id 입니다.', example: 1, required: true, }) @Type(() => Number) @IsNumber() readonly careerId: number; /** * 유저가 한국인인지의 여부를 boolean으로 나타냅니다. * @example true */ @ApiProperty({ description: '유저가 한국인인지의 여부를 boolean으로 나타냅니다.', example: true, required: true, }) @Type(() => Boolean) @IsBoolean() readonly isKorean: boolean; } export class SignUpWithUserNameDto extends SignUpDto { /** * 유저의 github userName입니다. * @example userName */ @ApiProperty({ description: '유저의 github userName입니다.', example: 'userName', required: true, }) @Type(() => String) @IsString() readonly userName: string; }Result
API가 수정될 때마다 Postman으로 요청에 대한 예외 처리들을 등록, 수정하는데 공수가 꽤 들었기 때문에, swagger로 개발 과정에서 코드로 정의 해주는 것이 더욱 편했다.
초기 개발 시, CI/CD 파이프라인을 구축하고 시작한 것이 아니었기 때문에 postman을 사용할 수 밖에 없었지만 배포 이후에는 확실히 Swagger가 좋았다. 특히 프론트엔드 팀원들도 Swagger의 try 기능을 통해 postman 통신하듯이 편하게 사용할 수 있었다.
또한, Postman으로 명세서를 작성하다 보니 API가 어떻게 동작하는지에 대한 자세한 설명(req 또는 res dto)을 직접 커스터마이징을 할 수가 없어서 해당 사항에 대해 설명해야 하는데 드는 비용이 만만치 않았는데 세세하게 문서화 할 수 있어 커뮤니케이션 비용이 줄었다.
물론 극 초기에는 gitbook이나 notion으로 간략한 API 명세서를 작성 후 공유해주는 것은 필요할 것 같다. 적어도 mock server에 사용할 mock data라도 전해주어야 서로 개발이 편하다.'Server > Nest.js' 카테고리의 다른 글
[Nest.js] 로컬에서 https 서버 구동하고 postman으로 테스트 하기 (0) 2023.04.04 [Nest.js 공식문서 읽기] Middleware (0) 2023.01.27 [Nest.js 공식문서 읽기] Provider (0) 2023.01.27 [Nest.js 공식문서 읽기] Module (0) 2023.01.27 [Nest.js 공식문서 읽기] Controller (0) 2023.01.27